A working website analytics setup means one GA4 property, one web data stream, a Google tag (or Google Tag Manager), tested events, and a written tracking specification. That is the whole checklist. Before you touch a single tag, decide: if your site is straightforward and you have an hour, you can do this yourself. If you need server-side tagging, cross-domain measurement, or Consent Mode v2 wiring, brief an agency and expect a 90-day delivery. Understanding why you track digital metrics at all is the right starting point if you are still weighing the investment.
Your five-step checklist:
- Write a tracking specification before opening GA4
- Create a GA4 property and web data stream
- Install the Google tag via GTM or manually
- Validate using GTM Preview, DebugView, and Realtime
- Wire Consent Mode v2 with a certified CMP
Pro Tip: If you are unsure whether to DIY or hire, answer one question: do you need to track revenue, PII, or ad-bidding conversions? If yes, hire an agency. If no, the DIY route is realistic.
Key takeaways
A correct GA4 setup requires a written tracking specification, a validated GTM container, and Consent Mode v2 wired before any tag fires.
| Point | Details |
|---|---|
| Spec before tags | Write your tracking specification first; it prevents misnamed events and missing parameters. |
| GTM over manual install | GTM lets you change events without touching site code and is recommended by Google’s developer guide. |
| Validate before going live | Confirm events in GTM Preview, DebugView, and Realtime before declaring the setup complete. |
| Consent Mode v2 is required | Wire a certified CMP with default-deny before any GA4 tag fires, especially for EU/EEA audiences. |
| Fyldedigital handles the full setup | Fyldedigital delivers tracking spec, GTM config, consent wiring, and handover documentation for SMBs. |
Table of Contents
- What do you need before you begin?
- Write a tracking specification before you add any tags
- How do you create a GA4 property and web data stream?
- How do you add the Google tag to your website?
- How do you verify that your GA4 setup is working?
- Which events should you track, and how do you set them up?
- How do you wire consent and privacy correctly?
- When should you move to server-side tagging and BigQuery?
- What does a realistic 90-day implementation plan look like?
- What are the most common beginner mistakes?
- Should you DIY, hire a freelancer, or hire an agency?
- An agency perspective on GA4 setups and common client pitfalls
- Fyldedigital’s GA4 setup service: what you get and how to start
- Sources
What do you need before you begin?
Three things must be in place before any tagging work starts: accounts, site access, and a clear brief.
Accounts to gather:
- A Google account with Editor role on the GA4 property
- A Google Tag Manager account (if using GTM, which is recommended)
- Admin access to your CMS or the ability to paste code into the
<head>of every page
Documentation to prepare:
- Your primary business goals (leads, sales, bookings, phone calls)
- A list of conversion definitions (what counts as a lead? what counts as a sale?)
- A named owner for analytics within your business
Pro Tip: Set the correct reporting time zone and currency during property creation. Changing them later resets historical data comparisons. Use GMT if you want to avoid daylight saving shifts in your reports.
Write a tracking specification before you add any tags
Always create a tracking specification before adding a single tag. This one document prevents the most common and costly errors: misnamed events, duplicate tracking, and missing parameters that make reports unreadable.
A tracking spec does not need to be long. A compact table covering five columns is enough for most SMBs:
| Business goal | KPI | Event name | Parameters | Validation method |
|---|---|---|---|---|
| Generate leads | Form submissions | lead_form_submit |
form_id, page_path |
DebugView + Realtime |
| Drive phone enquiries | Click-to-call clicks | contact_click |
click_type: phone, page_path |
GTM Preview + DebugView |
| Sell products | Checkout starts | begin_checkout |
currency, value, items |
DebugView + GA4 Explore |
| Grow bookings | Booking completions | booking_complete |
service_type, value |
Realtime + DebugView |
Store the spec in a shared Google Doc or Notion page. The business owner signs off on the goal column; the developer or agency signs off on the event and parameter columns. This single document becomes the audit trail if something breaks later. The 2026 implementation playbook treats a written tracking specification as the single most important first deliverable in any professional GA4 project.
Pro Tip: Name events in lowercase with underscores (lead_form_submit, not LeadFormSubmit). GA4 is case-sensitive, and inconsistent naming creates duplicate event rows in reports.
How do you create a GA4 property and web data stream?
Create one GA4 property per business and one web data stream per domain. Google’s GA4 setup guide walks through creating an account, property, and web data stream, and recommends enabling Enhanced Measurement for common interactions.
- In GA4, go to Admin → Create property
- Enter your property name, reporting time zone, and currency
- Under Data collection, select Web and enter your domain
- Enable Enhanced Measurement (this auto-tracks page views, scrolls, outbound clicks, site search, and file downloads)
- Click Create stream and copy the Measurement ID (format:
G-XXXXXXXXXX)
You can find the Measurement ID at any time under Admin → Data streams → [your stream] → Stream details. The official measurement documentation shows the exact location and includes the manual gtag.js snippet if you need it.
Pro Tip: The Editor role is required to create properties and data streams. Viewer access is not enough. Confirm your role before starting.
How do you add the Google tag to your website?
Google’s developer documentation recommends GTM for web tagging because it lets you add and change events without touching site code. There are three routes:
CMS route: Many platforms (WordPress, Squarespace, Wix) have a native GA4 or Google Tag field in their settings. Paste the Measurement ID directly. This works for simple setups but limits future flexibility.
Manual gtag route:
- Copy the gtag.js snippet from your GA4 data stream settings
- Paste it into the
<head>of every page on your site - Replace
G-XXXXXXXXXXwith your actual Measurement ID
Timing note: Google notes that when you install the Google tag manually, data collection may take up to 30 minutes to begin. Do not assume the tag is broken if Realtime shows nothing immediately.
GTM route (recommended):
- Create a new tag in GTM, tag type: Google Tag
- Enter your Measurement ID (
G-XXXXXXXXXX) - Set the trigger to Initialization – All Pages
- Click Preview to test before publishing
- Click Submit to publish the container
The Analytics Mania GA4 tutorial documents each of these GTM steps in detail, including the DebugView and Preview workflows.
How do you verify that your GA4 setup is working?
Validation must confirm two things: the Configuration tag is firing, and events are arriving in DebugView and Realtime.
Run these four checks in order before declaring the setup live: GTM Preview → Tag Assistant → GA4 DebugView → GA4 Realtime report. If any check fails, stop and fix before moving to the next.
GTM Preview mode: Click Preview in GTM, enter your site URL, and confirm the GA4 tag fires on page load. The Tag Assistant panel shows each tag and its trigger status.
DebugView: In GA4, go to Admin → DebugView. Events from your device appear in near-real time. Look for page_view and any custom events you have configured.
Realtime report: Go to Reports → Realtime in GA4. Active users on your site appear within seconds. This confirms data is flowing to the correct property.
Common fixes when validation fails:
- GTM container not published: click Submit in GTM
- Wrong Measurement ID: compare the ID in GTM with the one in GA4 Data Streams
- Trigger misconfigured: confirm the trigger type is Initialization – All Pages, not just Page View
Pro Tip: Screenshot your DebugView and tag firing logs before going live. These screenshots serve as your baseline audit evidence if a client or colleague later questions whether tracking was set up correctly.
Which events should you track, and how do you set them up?
Start with Enhanced Measurement for common interactions, then add a short list of business-critical custom events. Enhanced Measurement auto-collects page views, scrolls, outbound clicks, site search, YouTube engagement, and file downloads, but it cannot replace a planned custom event model for your specific KPIs.
Key custom events for most SMBs:
lead_form_submit— contact and enquiry form completionscontact_click— click-to-call and click-to-email linksbooking_complete— appointment or service bookingsadd_to_cartandbegin_checkout— e-commerce actionsfile_download— brochure or price list downloads (if not covered by Enhanced Measurement)
Pair each event with parameters from your tracking spec. Parameters are what turn a raw event count into a useful report. For example, lead_form_submit with a form_id parameter tells you which form on which page is generating leads. Knowing which digital marketing metrics to prioritise helps you decide which events deserve custom parameters.
Register every custom parameter as a Custom Definition in GA4 under Admin → Custom definitions → Custom dimensions. Without this step, your parameters will not appear in standard reports or the Explore tool.
How do you wire consent and privacy correctly?
Configure Consent Mode v2 and a certified Consent Management Platform (CMP) with default-deny before any GA4 tag fires. This is not optional for businesses with EU or EEA visitors.
The correct load order:
- CMP loads first and sets default denied states for
analytics_storageandad_storage - The user makes a consent choice
- The dataLayer fires a consent update event
- GTM reads the updated consent state and forwards the correct parameters to GA4
Compliance checklist:
- CMP is on Google’s certified CMP list
- Default state is deny for
analytics_storageandad_storage - Consent update call fires on user choice before any GA4 event fires
- No personally identifiable information (PII) is sent client-side
The 2026 architecture playbook recommends this CMP-first load order as a core requirement, not an optional add-on.
Pro Tip: Never send email addresses, names, or phone numbers as event parameters. Route any data that touches PII through server-side tagging where it can be hashed or stripped before reaching GA4.
When should you move to server-side tagging and BigQuery?
Move to server-side Google Tag Manager (sGTM) if events carry PII, affect revenue attribution or ad bidding, or are materially affected by browser-level tracking prevention such as Intelligent Tracking Prevention (ITP). Otherwise, start client-side and migrate later.
Decision criteria for server-side tagging:
- Events include PII that must be hashed before forwarding
- Conversion data feeds Google Ads bidding and accuracy is critical
- Ad blockers or ITP are measurably reducing your signal
- You need to strip referrer data or enrich events with server-side data
Link GA4 to BigQuery on day one, even if you do not plan to query it immediately. The raw export avoids GA4’s sampling limits, retains data beyond the standard retention window, and lets you join analytics data with your CRM for multi-year analysis. Once data is lost, it cannot be recovered retroactively.
What does a realistic 90-day implementation plan look like?
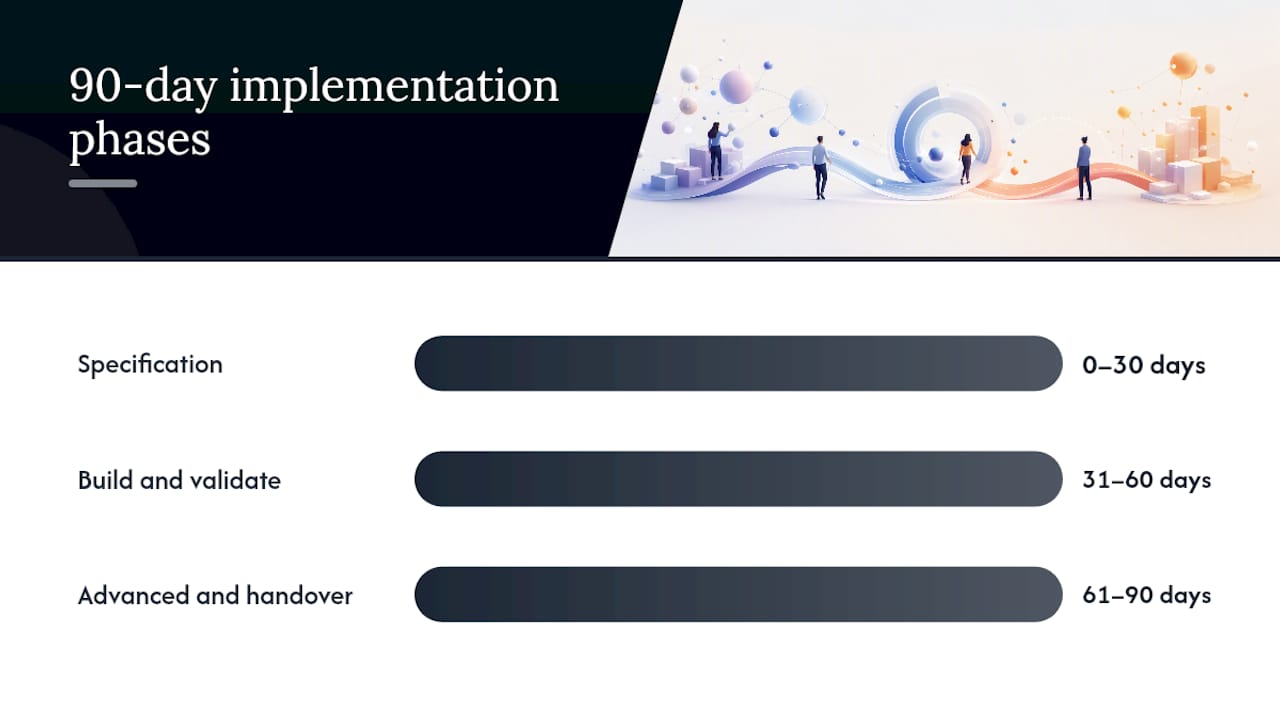
A correct from-scratch GA4 implementation typically runs about 90 days, covering specification, build, validation, and optional server-side or BigQuery work.
| Phase | Days | Milestones | Owner |
|---|---|---|---|
| Specification | 0–30 | Tracking spec signed off, accounts created, CMP selected | Business owner + agency/analyst |
| Build and validate | 31–60 | GTM configured, GA4 property live, events validated in DebugView, consent wired | Developer + analyst |
| Advanced and handover | 61–90 | sGTM decision made, BigQuery linked if required, documentation handed over | Agency or senior analyst |
DIY vs agency decision checklist:
- Simple site, no PII, no ad bidding: DIY is realistic with this guide
- E-commerce, lead-gen with revenue attribution, or EU consent requirements: brief an agency
- Server-side tagging or BigQuery: agency or specialist freelancer required
Agency proposals for a full GA4 setup typically include a tracking spec, GTM configuration file, DebugView validation screenshots, and a handover document. If a proposal omits the tracking spec, treat that as a warning sign.
What are the most common beginner mistakes?
The top three failures are an unpublished GTM container, an incorrect Measurement ID, and triggers firing on the wrong pages.
Quick debug checklist:
- Publish the GTM container (Preview mode does not send live data)
- Compare the Measurement ID in GTM with the one in GA4 Data Streams character by character
- Open GTM Preview and confirm the tag fires on the correct pages
- Check tag firing order: the GA4 Configuration tag must fire before any event tags
Other frequent issues include missing dataLayer values (events fire but parameters are empty), duplicated tags from both a manual gtag snippet and a GTM tag running simultaneously, and missing consent defaults that cause GA4 to receive no data at all from consenting users. A website review checklist can help you audit the broader technical setup before you begin tagging.
Pro Tip: If you suspect duplicate tags, open your browser’s Network tab and filter for google-analytics.com. Two requests per page load usually means two tags are firing.
Should you DIY, hire a freelancer, or hire an agency?
Hire when you need server-side tagging, BigQuery, cross-domain measurement, or a tracking spec and audit you cannot produce in-house. For a straightforward site with standard lead-gen events, a competent DIY setup using this guide is achievable.
Decision guidance:
- One domain, no PII, no ad bidding: DIY with GTM and this guide
- Multiple domains or subdomains: freelancer with GA4 cross-domain experience
- Revenue attribution, server-side, or BigQuery: agency with a documented delivery process
Briefing checklist for a freelancer or agency:
- Your completed tracking specification (goals, KPIs, events, parameters)
- A list of accounts and access levels you can grant
- Your measurable KPIs and what “success” looks like after 90 days
- Any existing tags or analytics code already on the site
Pro Tip: Ask any agency for a sample tracking specification from a previous project before signing. The quality of that document tells you more about their process than any sales conversation.
An agency perspective on GA4 setups and common client pitfalls
Most SMB analytics problems are not technical. They are process problems. The tracking spec is missing, naming conventions were never agreed, or the CMP was installed after the GA4 tag, which means months of data collected without valid consent.
The pattern we see most often: a business owner or their web developer installs GA4 via a CMS plugin, enables Enhanced Measurement, and assumes the setup is complete. Six months later, the data shows page views but no conversions, because no custom events were ever configured and no one registered custom definitions. The reports look busy but answer no business questions.
A staged approach fixes this. Spec first, then build, then validate with DebugView evidence before declaring the setup live. Consent wiring is not a final step; it belongs in the specification phase, before a single tag is written. Pairing quantitative GA4 data with qualitative tools such as session recordings and heatmaps gives you a fuller picture of why users behave as they do, not just what they do.
Fyldedigital’s GA4 setup service: what you get and how to start
Fyldedigital handles the full GA4 implementation for SMBs who want a compliant, auditable setup without the learning curve. The deliverables are concrete: a signed-off tracking specification, a GTM container configured with your events and Consent Mode v2, DebugView validation screenshots, and a handover document your team can maintain.

For businesses running Google Ads alongside their analytics, Fyldedigital wires GA4 conversion events directly into your Google Ads setup so bidding algorithms receive accurate signals from day one. The analytics and marketing decisions guide explains how that data feeds better campaign choices over time.
Request a free review or quote via Fyldedigital’s services page and get a clear proposal within a few working days.
Sources
These are the sources to bookmark for configuration, troubleshooting, and advanced implementation.
- GA4 Set up Analytics for a website and/or app – Analytics Help
- Google Analytics 4 Tutorial for Beginners – Analytics Mania
- How to Set Up Google Analytics 4 the Right Way in 2026 (From Scratch)
- Google Analytics for web (developer guide)